jmeter -n -t <test JMX file> -l <test log file> -e -o <Path to output folder>
https://jmeter.apache.org/usermanual/generating-dashboard.html
Generate a html report from logs
jmeter -g <log file> -o <Path to output folder>
jmeter -n -t <test JMX file> -l <test log file> -e -o <Path to output folder>
https://jmeter.apache.org/usermanual/generating-dashboard.html
Generate a html report from logs
jmeter -g <log file> -o <Path to output folder>
open a terminal and cd into the directory of the repo you want to work with and run:
git rev-parse HEAD
It returns a long string similar to this:
919a3996b3093b867073ff5c662b1f2cd4393357
from which you only need the first seven caracter. You should see them in the corresponding commit in bitbucket or github to double check in case of doubt.
Running a gradle project, you may encounter the error below. In my case it occurs after the gradle project crashed, requiring a restart.
Error message:
>Could not resolve all dependencies for configuration ':classpath'. >Could not load module metadata from /home/username/.gradle/caches/modules-2/metadata-2.97/descriptors/io.netty/netty-common/4.1.23.Final/671a8ecc284f9e9f4d35b614eb5de66e/descriptor.bin
Solution:
You need to delete the cache
cd /home/username/.gradle rm -r caches
If you run tensorflow in a docker console you can run the following code in your terminal:
docker exec b61a27999cb8 python3 -c "import tensorflow as tf; tf.compat.v1.Session(config=tf.compat.v1.ConfigProto(log_device_placement=True))"
If you run a jupyter notebook you add the following line:
import tensorflow as tf
print("Num GPUs Available: ", len(tf.config.list_physical_devices('GPU')))
https://docs.docker.com/storage/
https://docs.docker.com/storage/volumes/
docker run -it -p 8888:8888 -v /home/personal/Documents/tensorflowData:/tf/notebooks tensorflow/tensorflow:latest-gpu-jupyter
Change SOURCE_FOLDER and DEST_FOLDER accordingly (use absolute paths!).
Now if you navigate to localhost:8888 and create a notebook on DEST_FOLDER, it also should be available on SOURCE_FOLDER.
For tensorflow 2, the destination folder is /tf. You can create a folder of your choice, say: notebook, where you will save your file in your jupyter notebook. Those files will be available in the SOURCE_FOLDER you have set.
The changes in tensorflow-tutorials won’t be kept even if you choose it as your destination folder. You have to use another folder as detailed above.
import os
dir = "Your/Path/"
if not os.path.exists(dir):
os.mkdir(dir)
import shutilsource ='./source'destination ='./destination'dest =shutil.move(source, destination)

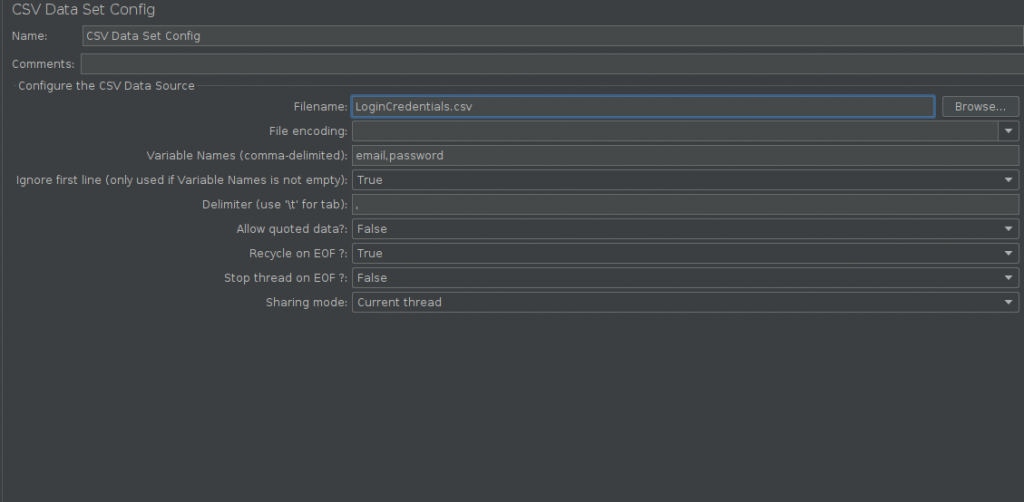
One obvious reason for this to happen is that you set the “ignore first line” parameter to true.
The most likely case is that you used the csv in another request before your loop. This previous request is taken into account and the first line is considered already done when the loop starts.
If you call the csv three times in three separate requests before using it in a loop, the loop will starts at the fourth line of the csv (disregarding the column name line), even though only the first line was read in the first attempt.
Revert is usually a safe operation as it create a new commit.
git revert <SHA>
Before you revert a commit, you might want to check what was change in the commit as you might want to keep changes that were lumped in the commit:
git show SHA
Go to proper branch and run:
git cherry-pick <HASH>
go to old branch, run:
git revert <HASH>
In case of error see: https://blog.seobytes.eu/development/git-returns-is-a-merge-but-no-m-option-was-given/
Command to use:
Set up bitbucket ssh access.
Open a terminal in local directory and run:
git init git checkout -b feature-branch
Create repository in Bitbucket and get the ssh url by clicking on the clone button.
In yout terminal run:
git remote add origin git@bitbucket.org:nicolashoquet/arcade.git
In case “origin” already exists, you can rename origin by running this command:
git remote rename origin https-origin
or use another name for origin (e.g. ssh-origin).
https://docs.github.com/en/github/getting-started-with-github/setting-your-username-in-git
Open a terminal
cd in the folder were you want to clone the repo:
$ cd directory/you/clone
$ git init
$ git config user.name “Your-Username” #can be different from your github username
$ git config user.email “your.email@example.com”
$ ssh-keygen -t rsa -C “your.email@example.com”
Enter file in which to save the key (/home/username/.ssh/id_rsa): /home/username.ssh/id_rsa
Copy the content of the id_rsa.pub in your Github settings in your profile.
Set Github local authentication to be able to clone and push: