Create user:
sudo adduser usernameAss user to sudo group:
sudo groupadd -aG sudo usernameDelete user:
sudo deluser usernameCreate user:
sudo adduser usernameAss user to sudo group:
sudo groupadd -aG sudo usernameDelete user:
sudo deluser usernamefind . -maxdepth 1 -type f -name '*.pdf' -exec pdftoppm -jpeg {} {} \;
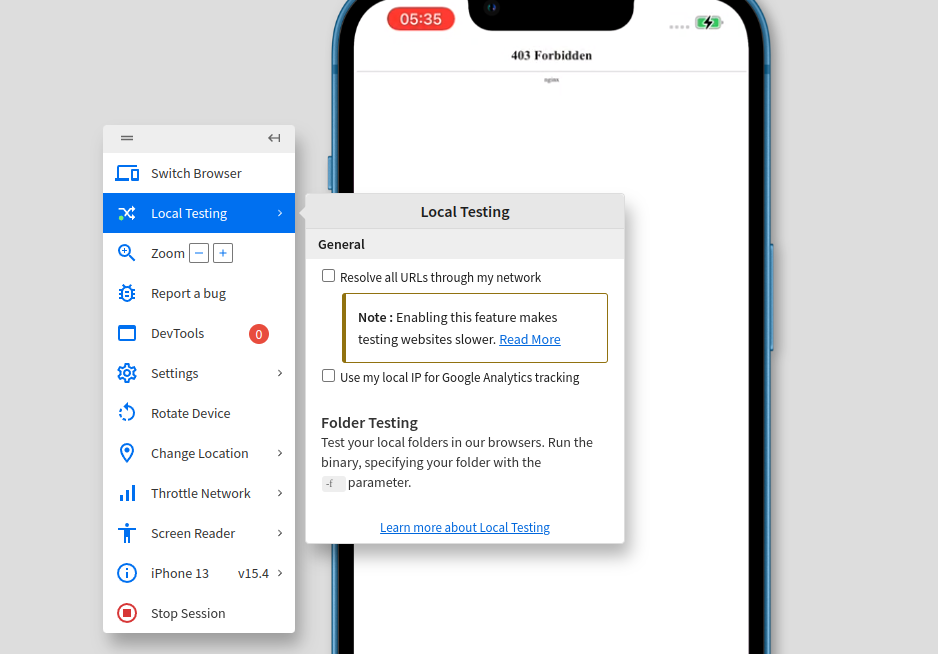
Browserstack resources:
https://www.browserstack.com/docs/live/local-testing
1 – Install the browserstack local binary
https://www.browserstack.com/browserstack-local/BrowserStackLocal-linux-x64.zip
2 – cd in the directory where the binary is located and run:
./BrowserStackLocal --key t9guUg6zxQ5Y9MBfciaZ3- in your browser access borwserstack and tick “Resolve all URLs through my network
you can also do that throught cli when running the binary:
./BrowserStackLocal --key t9guUg6zxQ5Y9MBfciaZ --force-localFor local testing, ensure that localhost is served on bs-local.com
see https://www.browserstack.com/docs/live/local-testing/test-using-local-testing
base64 -w 0 sourcefile.jpg > base64-code-saved-in-textfile.txtTo verify if a commit is an ancestor of another commit, the best solution is to run the following command:
git merge-base --is-ancestor <possible-descendant-commit-hash> <possible-ancestor-commit-hash>; echo $?
It will output 1, if possible-ancestor-commit-hash is an ancestor of possible-descendant-commit-hash.
Source:https://stackabuse.com/how-to-sort-dictionary-by-value-in-python/
Method 1
dict1 = {1: 1, 2: 9, 3: 4}
sorted_values = sorted(dict1.values()) # Sort the values
sorted_dict = {}

for i in sorted_values:
    for k in dict1.keys():
        if dict1[k] == i:
            sorted_dict[k] = dict1[k]
            break

print(sorted_dict)
Method 2
dict1 = {1: 1, 2: 9, 3: 4}
sorted_dict = {}
sorted_keys = sorted(dict1, key=dict1.get)  # [1, 3, 2]

for w in sorted_keys:
    sorted_dict[w] = dict1[w]

print(sorted_dict) # {1: 1, 3: 4, 2: 9}Note that it works equally well with an array of arrays.
# function to return the second element of the
# two elements passed as the parameter
def sortSecond(val):
	return val[1]

# list1 to demonstrate the use of sorting
# using second key
list1 = [(1,2),(3,3),(1,1)]

# sorts the array in ascending according to
# second element
list1.sort(key=sortSecond)
print(list1)

# sorts the array in descending according to
# second element
list1.sort(key=sortSecond,reverse=True)
print(list1)
Source: https://www.geeksforgeeks.org/sort-in-python/
To better control the development environment of your python project and ensure that your older project don’t break when updating packages, it is recommended to create a dedicated environment for your project.
For that purpose you can use python virtual environment.
Create environment:
python3 -m venv env
Activate environment:
source env/bin/activate
When intalling python library you may run into the following error:
Error: Could not install packages due to an OSError: [Errno 13] Permission denied
Solution: add –user at then end of your command
#delete tag from local
$ git tag -d <tag_name>
#delete tag from remote
$ git push --delete origin tagname
https://git-scm.com/book/en/v2/Git-Basics-Tagging
$ git tag -a v1.2 9fceb02 # -a flag is to add annotation in vim
$ git push v1.2